Showing posts with label wood. Show all posts

Thursday, October 28, 2010

Square Pumpkins


Chance's class has a Mystery Reader come in every week and read to them. I wanted to go in October so I could dress up. I decided to read the book "Spookley, the square pumpkin". It is a cute story about appreciating the differences in everybody.

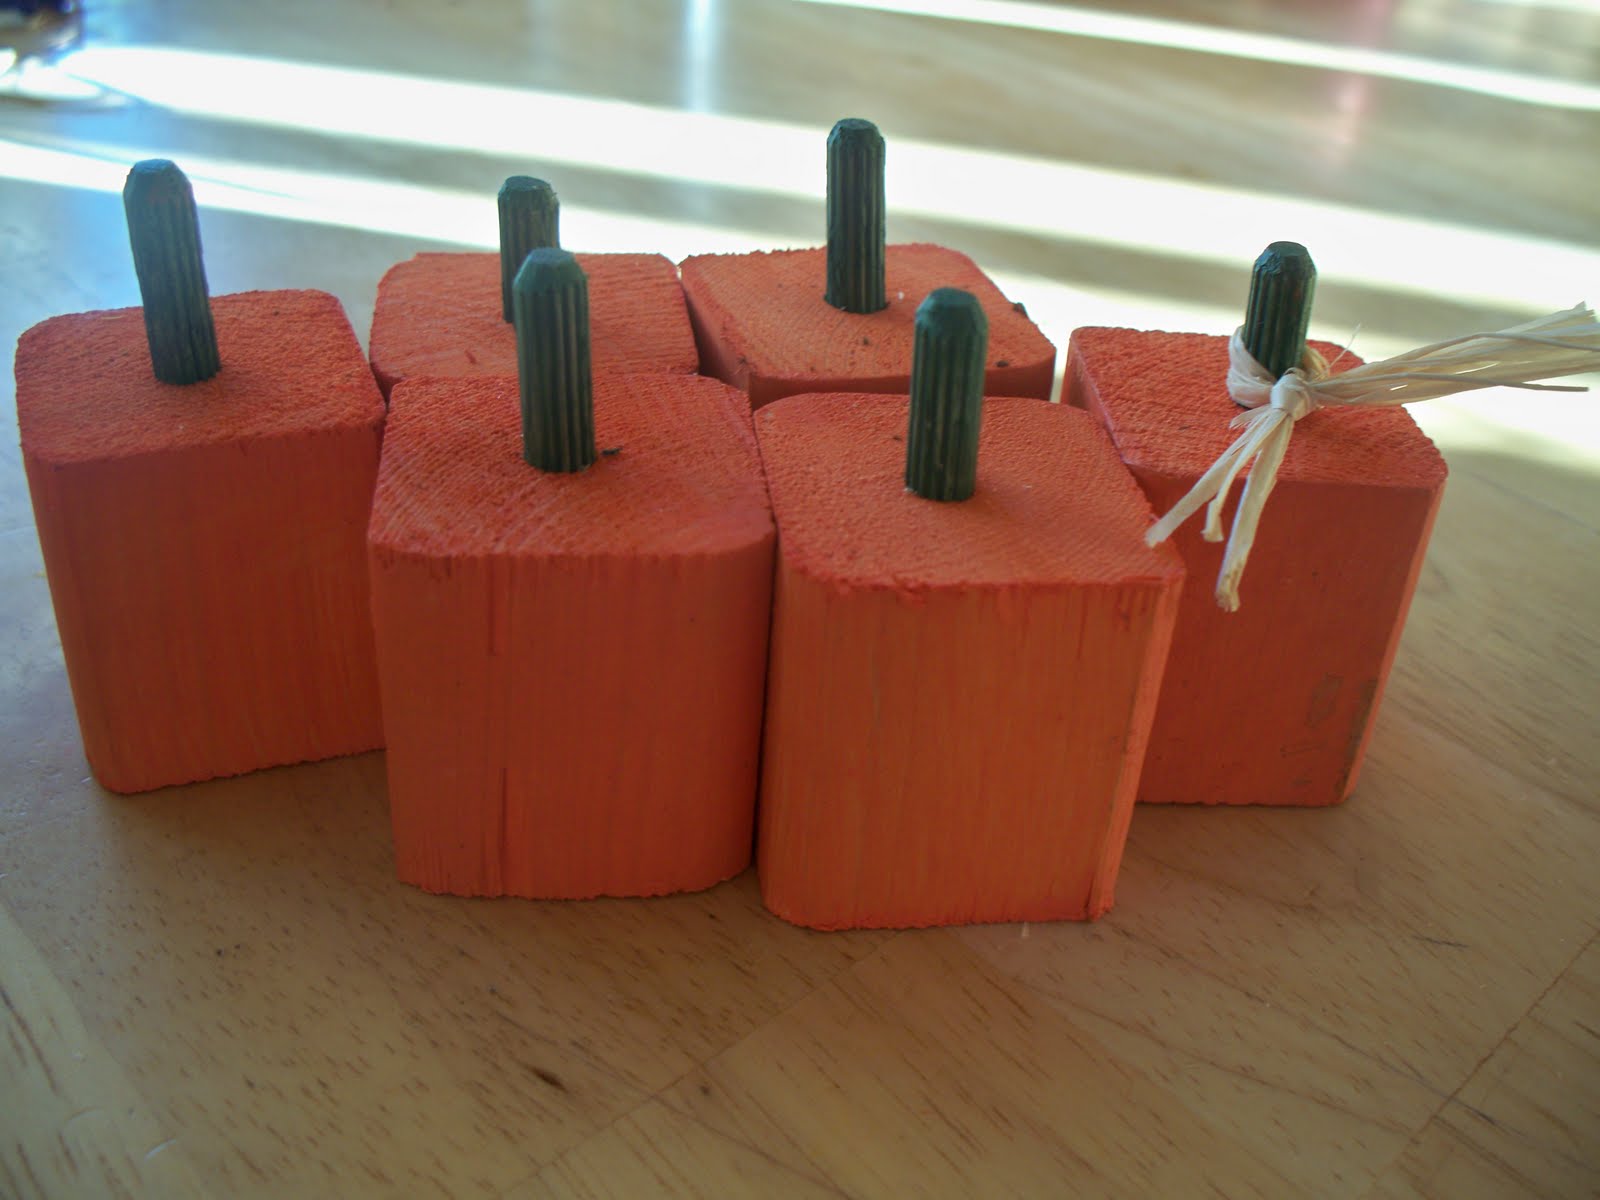
Well - as you can imagine, I couldn't go empty handed!! I thought it would be cute to give the kids a little square pumpkin. Literally, I made 25 of these in less than one hour!! That includes cutting the wood, painting, and assembling!! They are super easy and the kids LOVED them!!

I used a 2x2 piece of wood and cut them into squares. I drilled a hole into the top and painted them orange. I used dowel pins for the stems. I like them because they are a little bit textured but you could use regular dowels as well. I painted them green. Then I stuck the dowel pin into the drilled hole and hammered it in.

I debated adding the raffia or drawing a face on them - but I ended up liking them just plain.

Thursday, February 4, 2010

W

It seems like it takes me a long time to finish any project that I start..not sure why but I get distracted about 100 times and it takes twice as long as it should...Anyway, this is an idea that I have had rumbling around in my head for a couple of months and I FINALLY got around to finishing it. I wanted something to hang on my front door that was generic enough to leave up as long as I wanted. I think it turned out pretty good. In case I haven't said it before (which I have) - I LOVE my Silhouette. I used it to cut out all the flowers.

Anyway - here's my latest project in a long line of projects to work on:I glued magnets onto mine and hung it on the front door, but it would be just as cute on a shelf or wall.

Thursday, September 3, 2009

Organizer board


So the kids have been at school for just over a week and I got this crazy idea that I wanted to quickly make these 2 craft projects. Even though the kids are at school - it has still taken me almost 2 weeks to finish them between getting all the supplies and all the other little interruptions.

First, I had a VERY simple version of the following. It was basically just on paper and not very cute. I came across THIS BLOG and here's what I ended up with. I LOVE it because my kids know what they have each day and it shifts the responsibility from me to them to make sure they have library books or P.E. shoes. I'm all about shifting responsibility!! hahaha!

Wednesday, April 1, 2009

Wood Blocks


These were a fun project. I purchased a 4x4 post of wood and cut them down to 4x4 blocks. I found quotes that I liked and designed them into 3.75 squares. I painted the blocks and then used modge podge to adhere the paper to the block. Optional - you can use a damp sponge and dip it into your paint, and then dab it onto paper. Use the sponge to ink in the edges for a more complete look.

I made some blocks based on the Sister Beck's talk titled "Mothers Who Know" and gave them to the sisters that I visit teach along with a copy of the talk.

See here for another project that I made using the 4x4 block:

Thursday, January 15, 2009

Did u think to pray?


I had to borrow these pics from my sister because I failed to take pics of my girls. We did this as a class activity.

Here's what you'll need:
12x12 wood board
12x12 scrapbook paper (variety pack)
Letters (use your cricut or silhouette) or find someone with glow-in-the-dark vinyl lettering
modge podge
ribbon

Paint the board your desired color.
Use modge podge to adhere scrapbook paper

Wednesday, December 10, 2008

Name Blocks

My sisters and I made Name blocks a couple of years ago during a girl's weekend. This is the BEFORE picture:
And this is the AFTER picture. I recently updated them by removing the previous vinyl lettering and adding scrapbook paper. They are great for teacher's gifts as seen below:or for friends: